When it comes to working at heights, lifelines are one of your most important safety tools. They help keep workers secure and prevent falls that could result in serious injuries. But just having a lifeline isn’t enough; it’s crucial to inspect lifelines before each use to make sure they’re in top condition. A lifeline that’s worn out or damaged can fail when you need it most.
Here’s a simple, step-by-step guide on how to inspect lifelines before you head out for a job.
Why Inspect Lifelines?
Lifelines are essential for fall protection, and they work by providing a secure point for workers to attach their safety harnesses. Over time, however, these lifelines can experience wear and tear from friction, exposure to the elements, or improper handling. Regular inspections help catch issues before they turn into serious problems. When a lifeline is compromised, it’s not just about equipment failure; it’s about worker safety.
-
Step 1: Look Over the Lifeline Material
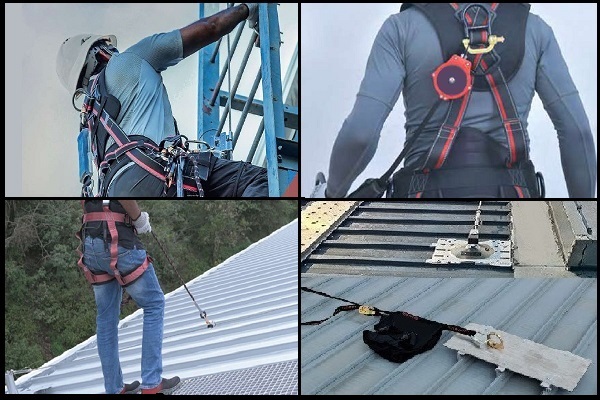
Lifelines come in a variety of materials, such as rope, cable, or webbing. The first thing you’ll want to do is visually inspect the entire length of the lifeline for any obvious signs of damage. Look for cuts, frays, burns, or abrasion marks. A rope lifeline, for example, can get frayed if it rubs against a rough surface. Steel cables may show signs of corrosion or even rust. Webbing can get frayed from excessive handling or poor storage.
-
Step 2: Check for Any kinks or Twists
Next, check the lifeline for any kinks, twists, or knots. Kinks can weaken the material, making it less effective at doing its job. Twists or knots in the line can also cause issues with the lifeline’s ability to move freely, or worse, they can become a point of failure during a fall. Ensure that the lifeline is straight and free of twists before use.
-
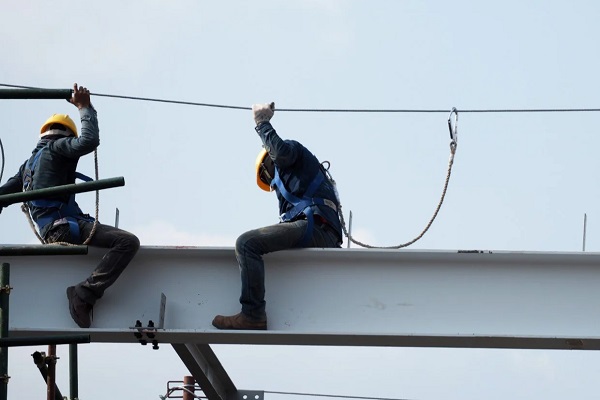
Step 3: Inspect the Anchorage Points
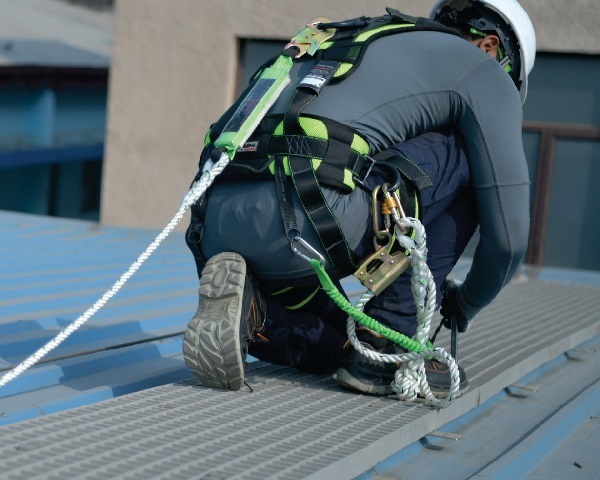
A lifeline’s anchorage point is the area where it attaches to a secure structure. This could be a fixed point like a beam, roof truss, or specialised anchor designed for this purpose. Inspect the anchorage for any signs of damage, corrosion, or instability. You’ll want to ensure that the anchorage is secure and able to bear the weight of a fall. The last thing you want is a lifeline that could detach mid-use.
-
Step 4: Examine the Connectors
Every lifeline will have connectors, whether they’re carabiners, hooks, or other types of fasteners. These connectors are what keep the lifeline attached to the worker’s harness and to the anchorage point. Take the time to check each connector for any signs of damage, such as bent gates, cracked frames, or worn-out locking mechanisms. You should also test the gate’s locking mechanism to ensure it works smoothly and securely.
-
Step 5: Look for Signs of Wear from Exposure
Lifelines are often exposed to harsh weather conditions, sunlight, and chemicals, all of which can cause deterioration. Inspect your lifeline for signs of UV damage or chemical exposure, especially if the lifeline has been used outdoors. UV rays can weaken materials over time, while certain chemicals can cause fabrics or cables to deteriorate faster. If the lifeline shows signs of excessive wear from exposure, it might be time to replace it.
-
Step 6: Perform a Physical Test
After checking all the components visually, give the lifeline a physical test. Pull on it to check for strength. A good lifeline should be strong enough to hold a worker’s weight without significant stretching or give. If the line feels weak or shows signs of breaking, don’t use it. Always replace any lifeline that doesn’t pass the strength test.
Final Thoughts
Inspecting lifelines before each use is an essential part of ensuring worker safety. By following these steps, you can help reduce the risk of accidents and falls on the job. Remember, it only takes a few minutes to do a proper inspection, but it can make all the difference in preventing serious injury. If you’re ever in doubt about the condition of a lifeline, it’s better to be safe than sorry—replace it!
Phakimisa Industries was established in December 2003 under the ownership Dave Sexaine, who now has over 40 years of experience in the lifting, rigging, and fall arrest industry. We are 100% BEE compliant and 50% BWO. We are committed to providing quality products and services to our customers and we’ll go the extra mile to ensure that they remain satisfied.